Engineering & manufacturing in Exeter, New Hampshire, USA since 1961 [email protected]
Toll Free (888) 597-9255 Tel +1 603-778-2300 Contact
0%

Choosing LED Power Supplies is a practical engineering decision, not merely a purchasing task. The correct supply affects brightness, lifetime, safety, energy use, and maintenance costs. The International Energy Agency’s Energy Efficiency 2023 report estimates that lighting consumes about 15% of global electricity. That figure makes every efficiency improvement meaningful.

A reliable selection begins with the LED load. Confirm the required output voltage, operating current, total wattage, dimming method, and expected ambient temperature. Add a sensible power margin, often 20% to 30%, rather than running the supply continuously at its limit. Small details matter. A 24-volt LED strip drawing 4 amperes requires 96 watts, before design margin. A 120-watt supply would provide a more comfortable operating range.

Efficiency alone is not enough. The U.S. Department of Energy’s Solid-State Lighting research reports show how LED efficacy has advanced substantially, yet thermal conditions still influence real-world performance. A poorly ventilated enclosure can shorten component life, even when the product label looks impressive. Check power factor, ripple, overload protection, surge resistance, and the manufacturer’s derating curve. For outdoor installations, verify the IP rating and cable-entry design, not only the marketing description.

Field experience also reveals a common mistake: selecting by wattage alone. A technically adequate supply may still create flicker, audible noise, or unstable dimming. Independent certification, traceable test data, and clear warranty terms improve confidence. Standards and test methods vary by market, so project documentation should be reviewed carefully. There is no universal “best” supply. The best choice depends on the load, environment, controls, installation quality, and the compromises the project can genuinely accept.
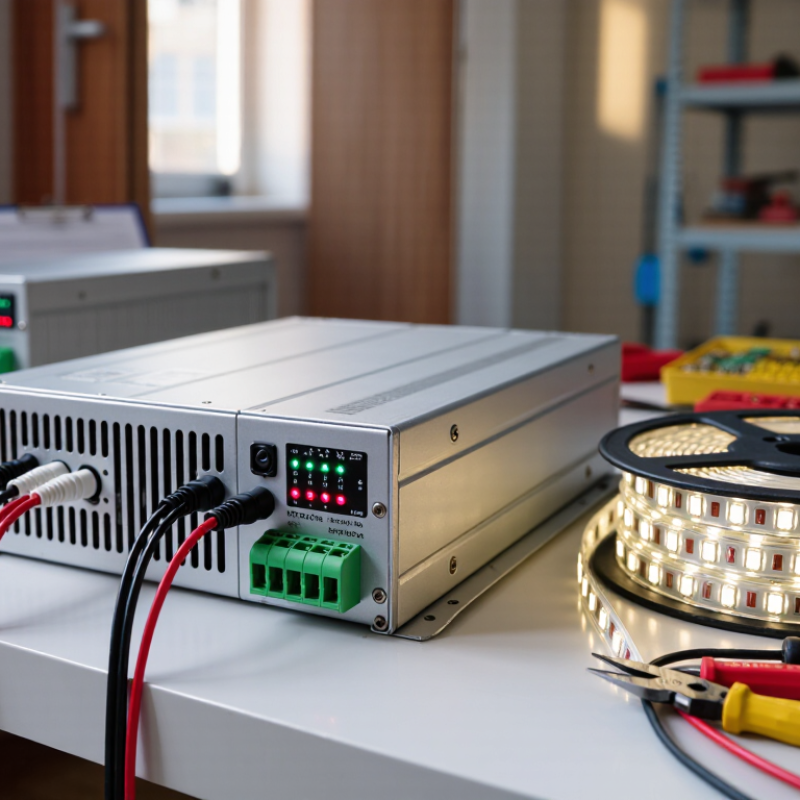
How to Choose LED Power Supplies for Your Project?

Define the LED Power Supply’s Role in Your Project

Choosing an LED power supply begins with defining its role, not its price. It converts incoming electricity into stable voltage or current for the LED system. It also manages heat, dimming, protection, and electrical compatibility. A practical design question is simple: should the supply deliver constant voltage or constant current? Flexible strips commonly require constant voltage, while many high-power modules need constant current.

The U.S. Department of Energy’s Energy Savings Forecast of Solid-State Lighting in General Illumination Applications estimates that LED adoption could save 7.8 quadrillion British thermal units annually by 2035. That efficiency depends on the whole system, including the driver. A supply that runs near its limit may become hot inside a sealed ceiling cavity. Heat shortens component life. Choose a unit with adequate wattage headroom, commonly 20% to 30%, and verify its operating temperature range.

Safety is part of performance. IEC 61347-1 and IEC 61347-2-13 address requirements for lamp controlgear and LED modules. Check insulation, overload protection, ingress rating, and electromagnetic compatibility before installation. A weather-resistant supply is not automatically suitable for permanent outdoor exposure. This is where many project plans become too optimistic. Cable length, voltage drop, ventilation, and dimmer compatibility can change the result. Measure the real load, not only the label. A quieter, cooler supply may cost more initially, but the cheaper choice can become expensive when flicker or early failure appears.

Match Voltage and Current Requirements to Your LED Load

How to Choose LED Power Supplies for Your Project?

Match Voltage and Current Requirements to Your LED Load

Choosing an LED power supply starts with the load, not the fixture’s appearance. Check the LED system’s rated voltage and operating current. A 24-volt LED strip needs a regulated 24-volt supply. Using a higher voltage can damage its components quickly. For constant-current modules, match the specified current instead. Voltage must stay within the module’s allowed range. I once allowed too little capacity for a long strip, and the far end became visibly dimmer. That mistake showed me why calculations should come before installation.

Calculate total power by multiplying voltage by current. Add every section, including controllers and connection losses. Then select a supply with practical headroom, often 20 percent above the calculated load. Avoid excessive oversizing, though. A very large supply may operate inefficiently at a light load. Confirm polarity, connector type, dimming compatibility, and input voltage. These details seem small.

Tips:

Measure the actual load when possible. Use a multimeter before final mounting. Check voltage at the farthest LED point, not only near the supply. Keep wires short and suitably sized to reduce voltage drop. Leave ventilation space around the enclosure. Protect connections from moisture when the installation requires it. Test the system for heat after several hours. A cool supply is reassuring, but it does not replace proper ratings. Rethink the choice if flicker, buzzing, or uneven brightness appears.

Choose the Right Power Supply Type and Dimming Method

Choosing an LED power supply starts with the load, not the fixture’s appearance. Constant-voltage supplies suit LED strips and modules rated at 12V or 24V. Constant-current supplies suit LEDs requiring a specified current, such as 700mA. Mixing these types can cause flicker, overheating, or early failure. The U.S. Department of Energy reports that solid-state lighting can deliver substantial energy savings, but poor system matching reduces that benefit. The choice looks simple. It is not.

Dimming compatibility deserves equal attention. PWM dimming works well with many constant-voltage strips, but low frequencies may create visible flicker in cameras. Analogue 0–10V control offers smooth adjustment, while DALI supports digital addressing and lighting scenes. The International Energy Agency estimates lighting uses about 10% of global electricity consumption, making controllable output a practical efficiency decision. Select a supply with at least 20% spare capacity, then check minimum load requirements. Oversizing too far can also reduce performance. Real installations are less tidy than spreadsheets.

Tips: Read the LED datasheet and dimmer datasheet together. Confirm voltage, current, wattage, indoor or outdoor rating, and cable length. Test the system at its lowest dimming level before installation. The U.S. DOE also highlights flicker as an important quality concern in LED lighting evaluations. Do not trust a “dimmable” label alone. Record the measured load, because field results often differ slightly from calculations.

How to Choose LED Power Supplies for Your Project?

Choose the right power supply type and dimming method based on LED load requirements and the desired control range.

The chart shows commonly specified minimum controllable output levels. Lower values indicate finer dimming capability. Actual performance depends on the LED driver, controller, wiring, and luminaire design.

Constant-Voltage Supply

Use with LED strips and modules designed for a fixed voltage, commonly 12 V or 24 V DC. Select a supply with sufficient wattage and voltage compatibility.

Constant-Current Supply

Use with LED fixtures that require a controlled current. Verify the driver’s current rating and output-voltage range match the fixture.

Dimming Method

PWM is widely used for low-voltage LED loads, 0–10 V is common in building controls, and DALI provides digitally addressable control for compatible systems.

Evaluate Efficiency, Safety Ratings, and Environmental Protection

Choosing an LED power supply starts with efficiency, but efficiency is not a single headline number. Check performance at the load your project will actually use. A supply rated at 92% efficiency may perform differently at 20% load. Thermal conditions matter too. In a sealed ceiling, heat can shorten capacitor life and reduce output stability. The U.S. Department of Energy’s Energy Savings Forecast of Solid-State Lighting report estimated that efficient LED adoption could save 1,077 terawatt-hours annually by 2035. Small supply losses still matter at this scale.

Safety ratings deserve equal attention. Look for documented compliance with IEC 61347-1 and IEC 61347-2-13, plus clear protection against short circuits, overloads, and overheating. Verify input surge performance, insulation class, and leakage current in the test report. A clean datasheet is not proof. Ask for laboratory evidence. Also check power factor and total harmonic distortion when many units share one circuit.

Environmental protection depends on the installation, not only the product label. IP65 may suit sheltered outdoor lighting, while exposed coastal equipment may need stronger sealing and corrosion control. Confirm the operating temperature range, humidity tolerance, and derating curve. The IEC 60529 IP code describes enclosure protection, not complete weather resistance. This distinction is easy to miss. I would also review material restrictions and disposal documentation, because environmental claims without traceable records remain weak.

Confirm Installation, Wiring, and Long-Term Reliability Needs

Choose the power supply after confirming the installation environment, not before. A 24-volt LED system needs a supply rated for the same voltage and at least 20% more wattage than the calculated load. For example, a 120-watt load should use a supply rated near 150 watts. This reserve reduces thermal stress during startup and future expansion.

Measure the cable run. Long, thin wires create voltage drop, causing dimming near the far end. Keep high-current cables short, use suitable conductor sizes, and verify polarity before energizing the circuit. The International Energy Agency reports that lighting uses roughly 15% of global electricity, so small efficiency losses can become significant across many installations. Follow IEC 61347-1 and IEC 61347-2-13 requirements for safety and LED controlgear.

Heat is the quiet failure source. The U.S. Department of Energy’s LED Luminaire Lifetime report explains that rated life often refers to lumen maintenance, not guaranteed power-supply survival. Keep the supply ventilated, away from insulation, water, and direct sunlight. Check the case temperature after several hours. It should not feel dangerously hot. I have seen installations fail because the enclosure was technically “protected,” but had no airflow. That assumption deserves review. Inspect terminals, strain relief, and protective grounding during maintenance, then record temperatures and voltage readings for future troubleshooting.

How to Choose LED Power Supplies for Your Project? - Confirm Installation, Wiring, and Long-Term Reliability Needs
Selection Dimension What to Confirm Practical Requirement or Calculation Recommended Project Decision Why It Matters for Reliability
LED Input Type Determine whether the LED load requires constant-voltage or constant-current operation. Common LED strips and many modules use constant voltage, such as 12 V or 24 V. High-power LED boards may require a specified constant current. Match the power supply output type to the LED manufacturer's electrical specification. Using the wrong output mode can cause unstable operation, excessive current, overheating, or premature LED failure.
Output Voltage Verify that the supply voltage matches the nominal LED system voltage. For a 24 V LED system, select a regulated 24 V DC output. Do not substitute a higher voltage to compensate for voltage drop. Use the same nominal voltage across the supply, wiring, dimmer, controller, and LED load. Overvoltage can damage LEDs and controls, while undervoltage can produce dimming, flicker, or uneven brightness.
Load Power Calculate the total wattage of every connected LED section and accessory. Total load = LED power per metre × installed length + controller, sensor, or fan power where applicable. Base the calculation on the actual maximum load, not the typical or average operating load. A correct load estimate prevents nuisance shutdowns and reduces thermal stress on the power supply.
Capacity Margin Allow additional capacity for continuous operation, temperature, and future expansion. A commonly used planning margin is 20% to 30% above the calculated maximum load. Choose a supply with a rated output comfortably above the design load without greatly oversizing the unit. Headroom helps limit heating and supports more stable long-term performance.
Input Voltage and Frequency Confirm compatibility with the available AC supply at the installation site. Check the rated input range, such as 100–240 V AC, and the permitted mains frequency before installation. Select an input rating that covers the actual local electrical service. Incorrect input conditions can cause tripping, overheating, insulation stress, or complete failure.
Indoor or Outdoor Location Assess exposure to rain, condensation, dust, washdown, and direct sunlight. For outdoor or damp areas, use an enclosure with an appropriate ingress-protection rating and sealed cable entries. Install the supply in a dry, ventilated location whenever possible; do not rely on an enclosure rating alone. Moisture ingress and condensation are major causes of corrosion, leakage current, and short circuits.
Thermal Environment Check ambient temperature, airflow, enclosure size, and proximity to heat sources. Keep ventilation openings clear and follow the power supply's specified operating-temperature and derating limits. Reduce the operating load or improve ventilation when the installation is hot or enclosed. Higher temperature accelerates component aging and can reduce available output power.
Wiring Gauge Choose conductors based on current, cable length, allowable voltage drop, and installation method. For a constant-voltage circuit, current is approximately output power ÷ output voltage. Longer runs generally require larger conductors. Use wiring sized according to applicable electrical codes and verify the manufacturer's terminal limits. Undersized wiring can create voltage drop, hot spots, flicker, and fire risk.
Voltage Drop Evaluate the voltage at the farthest LED point, including the complete circuit path. Voltage drop depends on current, conductor resistance, cable length, and conductor cross-sectional area. Keep cable runs short, increase conductor size, or distribute power through multiple injection points. Excessive drop commonly causes dimmer LEDs at the end of a strip and uneven illumination.
Power Distribution Decide whether the load should use one feed, multiple feeds, or separate power supplies. Long LED strips often benefit from power injection at more than one point, following the LED system's wiring limits. Use parallel distribution only where the circuit design, polarity, and protection are clearly defined. Balanced distribution reduces current concentration, connector heating, and brightness variation.
Dimming and Controls Confirm compatibility with PWM dimmers, controllers, sensors, or building-control systems. Check control signal type, dimming range, minimum load, switching frequency, and maximum output current. Place the dimmer or controller where its voltage and current ratings are not exceeded. Incompatible controls can cause audible noise, visible flicker, erratic dimming, or overheating.
Flicker and Lighting Quality Identify whether the space is sensitive to visible or camera-detectable flicker. Review the driver's output behavior and dimming method; flicker performance can vary with load and control settings. For offices, retail, video, or precision work areas, specify a low-flicker solution and test it at intended brightness levels. Reduced flicker improves visual comfort and avoids problems in photography, video recording, and sensitive work environments.
Protection Features Review short-circuit, overload, overvoltage, overtemperature, and input surge protection. Protection features should be stated in the technical documentation and coordinated with upstream circuit protection. Use protective functions as a supplement to, not a replacement for, correct wiring and circuit protection. Protection can limit damage during wiring faults, blocked ventilation, or abnormal operating conditions.
Grounding and Isolation Determine whether the enclosure requires protective earth and whether the output is isolated from the input. Follow the product wiring diagram and local electrical rules for protective earth, double insulation, and low-voltage output circuits. Connect earth where required and keep AC and DC wiring physically separated. Correct grounding and isolation reduce electric-shock risk, interference, and fault-current hazards.
Connectors and Terminals Check terminal current rating, wire size range, polarity, strain relief, and tightening requirements. Positive and negative conductors must be correctly identified; exposed connections should be enclosed and protected from accidental contact. Use secure, appropriately rated connectors and inspect all terminations before energizing the system. Loose or reversed connections can cause arcing, voltage drop, intermittent faults, or immediate damage.
Installation Access Plan for inspection, cleaning, replacement, and future troubleshooting. Leave adequate clearance around the supply and avoid burying serviceable components behind permanent finishes. Provide accessible mounting and label the AC input, DC output, polarity, and circuit identification. Accessible installations reduce maintenance time and make fault diagnosis safer and more accurate.
Compliance Documentation Verify that the product documentation includes electrical ratings, wiring diagrams, safety instructions, and applicable certifications. Documentation should state input and output ratings, environmental limits, mounting orientation, and derating information. Use equipment accepted for the intended region and application under applicable electrical regulations. Traceable documentation supports safe installation, inspection, maintenance, and project approval.
Long-Term Testing Test the complete system at maximum intended load and operating temperature. Measure output voltage at the supply and at the farthest LED point; inspect temperature, flicker, noise, and dimming behavior. Record test results and recheck connections after the system has operated under normal conditions. Commissioning can reveal voltage-drop, thermal, compatibility, and wiring issues before they become field failures.

FAQS

How do I match an LED power supply to my lighting load?

Check the LED system’s rated voltage and operating current. A 24-volt strip needs regulated 24-volt output. Higher voltage can damage components quickly. Constant-current modules require the specified current instead. Do not guess here.

How much power capacity should the supply have?

Multiply voltage by current to calculate power. Include LED sections, controllers, and connection losses. Choose about 20% more capacity than the calculated load. A 120-watt load needs roughly 150 watts. Too much reserve can reduce efficiency.

Why might the far end of an LED strip look dim?

Long, thin wires can create voltage drop. The distant LEDs receive less voltage. Keep high-current cables short and suitably sized. Measure voltage near the supply and at the farthest point. I once ignored this. The result was obvious.

What installation details should I confirm before connecting power?

Verify polarity, connector type, input voltage, and dimming compatibility. Check every connection before energizing the circuit. A small mismatch can stop the system or damage components. Use a multimeter before final mounting.

How should I evaluate power supply efficiency?

Check efficiency at the project’s actual load. A rating measured near full load may not apply at 20% load. Review power factor and harmonic distortion for shared circuits. Small losses matter across many installations. The headline number is not enough.

What safety information should the power supply include?

Look for documented safety compliance and clear protection features. Important protections include short-circuit, overload, and overheating control. Review insulation, leakage current, and surge performance. A clean datasheet is not proof. Ask for test evidence.

Which environmental protection rating is suitable?

Match enclosure protection to the real installation environment. An IP65 enclosure may suit sheltered outdoor lighting. Exposed coastal locations may require stronger sealing and corrosion control. Check temperature, humidity, and derating information. An IP rating is not complete weather protection.

How can I improve long-term reliability?

Provide ventilation around the power supply. Keep it away from insulation, water, and direct sunlight. Check case temperature after several hours. Inspect terminals, strain relief, and grounding during maintenance. Record voltage and temperature readings. A protected enclosure can still overheat. That assumption deserves review.

Conclusion

Choosing the right LED Power Supplies is essential for creating a safe, stable, and efficient lighting system. Start by defining the power supply’s role, including the required output voltage, current, and total wattage for the connected LED load. Selecting a unit that matches these requirements helps prevent flickering, overheating, reduced brightness, and premature component failure. It is also important to choose a suitable power supply type and dimming method based on the project’s control needs, installation location, and lighting behavior.

Beyond basic compatibility, evaluate efficiency, electrical safety ratings, and environmental protection, especially for installations exposed to heat, moisture, dust, or changing outdoor conditions. Before installation, confirm wiring methods, connection capacity, ventilation, mounting requirements, and access for future maintenance. A reliable solution should provide sufficient power headroom, stable performance, and appropriate protection against common electrical problems. By considering both immediate operating requirements and long-term reliability, you can select LED Power Supplies that support consistent lighting performance and a safer, more durable project.

Olivia

Olivia

Olivia is a dedicated marketing professional with a strong understanding of the company’s products, customers, and industry trends. With a thoughtful, research-driven approach, she transforms complex product information into clear, practical, and engaging content that helps readers make informed......